Build Your Own TiVo (aka - Home Brewing Your Own PVR)
Last Updated: 04/28/06
Write-Up Index:
- What is a PVR?
- Hardware List
- Software List
- Building The PC
- OS/Software Installation
- Minimum PVR Recommendations
- Related Useful Site Links
- Frequently Asked Questions (Q & A)
- Screenshots - GBPVR Application
- Screenshots - GBPVR Config Settings
What is a PVR:
A PVR is a fully featured Personal Video Recorder (PVR), similar to that of a TiVo. It allows you to use a PC to schedule TV recordings and view/pause live TV. In additional to this functionality, it also acts as a media center allowing you to watch movies, listen to music, view pictures, listen to FM radio and streaming Internet radio stations, among other things.
Using a PC, hardware encoding TV tuner cards & PVR software, you can easily create your own PVR, which supports multiple tuners, allowing you to record more multiple channels at one time & stream the video across your home network.
These are only the beginnings of how to build/use your own custom PVR. With the use of plug-ins and extra hardware, the sky's the limit.
In my example PVR, it was built with the following hardware:
| Hardware Type | Name/Model | Cost | Reason Selected |
|---|---|---|---|
| Motherboard | Via Epia SP13000 (w/1.3Ghz CPU) | $210.00 USD |
|
| Memory | 1 Gig Transcend DDR400 RAM | $123.00 USD |
|
| Storage | 100 Gig Maxtor Ultra 7200RPM IDE Hard Drive | $99.00 USD |
|
| Storage | 500 Gig Hitachi DeskStar 7200RPM IDE Hard Drive | $380.00 USD |
|
| TV Tuner | Hauppauge WinTV PVR-500MCE PCI Card | $170.00 USD |
|
| CD/DVD | Samsung 16X DVD +/- RW IDE Drive | $40.00 USD |
|
| Remote | SoundGraph iMon Inside Remote | $75.00 USD |
|
| PC Case | Morex 668 Mini-ITX case | $95.00 USD |
|
| Misc/Other | PCI Riser w/ribbon cable | $15.00 USD |
|
| Misc/Other | Longer Round IDE Cable | $13.00 USD |
|
| Misc/Other | USB 1.44 Meg Floppy Drive | $39.99 USD |
|
* Hardware Cost Notes/Disclaimer:
- Costs represented above are current average going rate for each piece of hardware at the time of this write-up (04/02/06)
- Costs shown do not show/include rebates, discounts or related shipping fees.
- The above doesn't state which hardware I already owned or have obtained free from friends.
- The ucosts for hardware noted above are subject to change at any time, so don't hold me these numbers.
And using the following software/drivers:
| Software Type | Name/Version | Obtained From | Reason Used |
|---|---|---|---|
| Motherboard BIOS | Via Epia Bios v1.06 BETA1 | www.viaarena.com |
|
| Operating System | Windows XP Pro w/SP2 | Retail Store |
|
| PVR Software | GBPVR v0.96.12 | www.gbpvr.com |
|
| TV Tuner Driver | Hauppauge PVR500 drivers v2.0.24.23025 | www.shspvr.com |
|
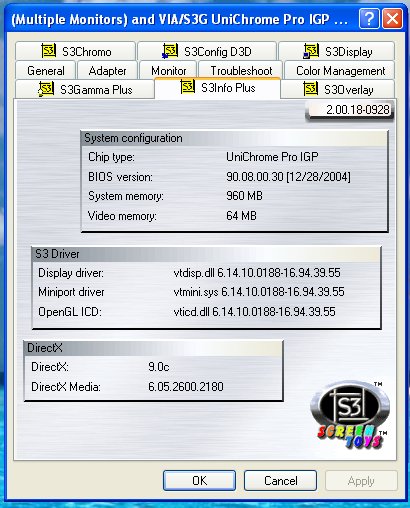
| Video Card Driver | Epia SP Video Card Driver v16.94.39.55 | www.via.com.tw |
|
| MPEG Decoder Codec | Cyberlink 5 MPEG2 Decoder | www.free-codecs.com ACE Mega CodecS Pack 6.03 - Professional Edition |
|
| Remote Control Driver/App | iMON/iMEDIAN v4.51.0202 | www.soundgraph.com |
|
Building The PC:
- set jumpers on motherboard to
[use the PDFs on Via's site to see where everything connects to.] - connect each cable in the case to the motherboard.
[use the PDFs on Via's site to see where everything connects to.]
This should include cables for:- power supply cable
- power button
- reset button
- 2 USB port cables
- 1 Firewire port cable
- microphone port (optional)
- headphone port (optional)
- 2 IDE cables
(use the round IDE cable for Primary IDE controller)
(use a flat IDE cable for Secondary IDE controller) - 2 40mm Case Fans
(one goes to the motherboard & one gets connected to the power supply cables)
- put RAM into motherboard's RAM slot
- carefully mount motherboard in bottom of case
- lock down motherboard in case with screws provided
- set 100 Gig IDE drive as 'Master'
- set 500 Gig IDE drive as 'Slave'
- mount 100 Gig IDE drive in case's bottom/hidden 3.5" bracket/bay
(position IDE connector to fact right side of case, label side up) - mount 500 Gig IDE drive in case's top/exposed 3.5" bracket/bay
(position as far back as possible - IDE connector faces back of case, label side up)
(you should still have room to insert that 3.5" bay cover you removed) - connect round primary IDE cable to 100 Gig IDE drive
(use the connector that is in the middle of the cable) - connect round primary IDE cable to the 500 Gig IDE drive
(use the connector that is at the end of the cable) - connect power cables to both IDE drives
- set DVD drive to 'Master'
- mount DVD drive in either 5.25" exposed bracket/bay
(for best placement, I recommend using the top 5.25" bay) - if you have it, connect an audio jumper cable from the DVD drive to the motherboard
- connect flat secondary IDE cable to DVD drive
(use the connector that is in the middle of the cable) - cut bracket for iMon remote control receiver to fit exposed 3.5" bay
(should be same size as that 3.5" bay cover you removed) - snake iMon receiver cable though case down to motherboard
(this is where having the DVD drive in the upper 5.25" bay helps) - slide iMon receiver into 3.5" bay & screw in place
(depending upon how you did things, you may need to drill holes into the iMon receiver bracket)
(these holes will let you secure it to the case [1 screw on each side]) - connect iMon receiver cable to motherboard USB port
(you may need to hack your iMon USB cable & create your own connector)
(this will let you connect it to the block of USB pins on the motherboard)
(you can also use the motherboard's USB's 5v pin to power your iMon receiver) - insert the gold pinned edge of the PCI Riser into the PCI slot on the motherboard
- mount the port bracket with came with the PVR500 card into the inner most slot of the case
(this should align with the PCI slot you just plugged the PCI Riser into) - secure that bracket of ports with a screw to the case.
(it should just fit in there & be snug in the case) - grab the end of the cable which comes off that bracket of ports
- connect that to the first connector on the very top of the PVR500 card
(the cable for that bracket of ports, will bend/hang over the top of the PVR500 card) - insert your PVR500 card into the PCI slot of the PCI Riser
- carefully slip the PVR500 card into position, in the open slot of the outer edge of the back of the case.
- secure the PVR500 card in place with a screw.
(at which point you should have the PVR500 locked card in place, with that brackets wires going over the top of it)
(it should look like the card is floating over the bottom of the case - this is normal to see)
(the card will not go anywhere, if the card is secured properly with that single screw.) - at this point your done building your PC...
- time to double check & clean up things...
- double check all the connections, make sure they are tight and connected properly
- double check your jumper settings, make sure they are right for your configuration
- ensure everything is mounted correctly & properly aligned (we don't want to short circuit anything)
- bundle/tie-up any loose wires
- make sure nothing is blocking the vents & all the fans.
- if everything is good, then it's time to connect your monitor/keyboard/mouse & boot up the PC
- If you don't blow up anything, you should get to see the boot prompt on the screen
- assuming everything goes well, you can proceed with installing the OS and software.
- however if things went bad, you will have to debug you hardware issues & see where you want wrong...
OS/Software Installation:
- install Windows OS
Beginners Guide: Installing Windows XP - install motherboard drivers
see manual & CD which came with motherboard - install PVR card drivers
(Only follow steps # 1 to 6) - install MPEG2 decoder codec
(use the 'Just Play' option) - install GBPVR
(follow steps here)
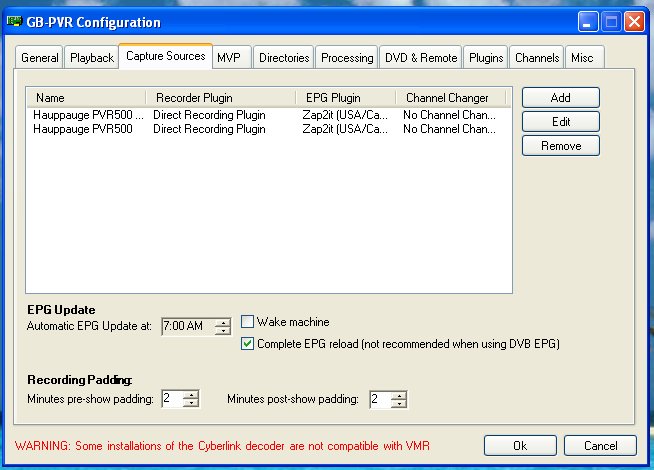
(for the PVR500 card, you will need to create 2 capture source devices [1 per tuner]) - start watching TV & recording shows
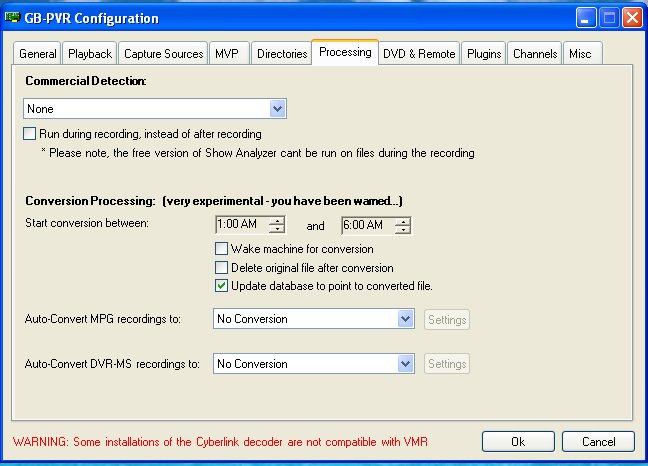
:-) - (optional)tweak your PVR for better performance
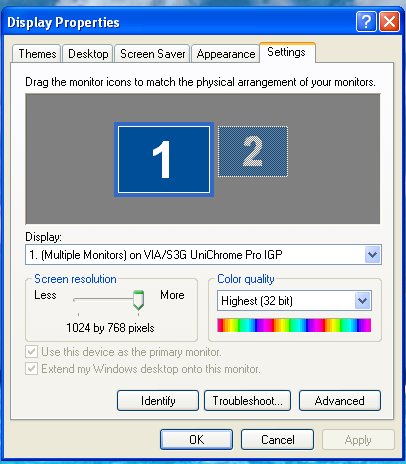
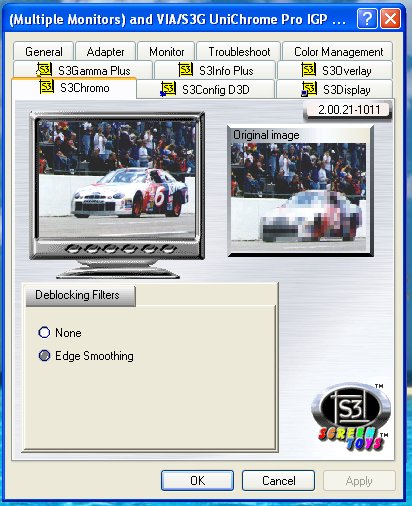
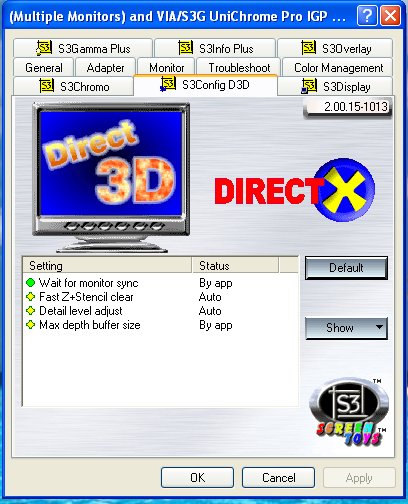
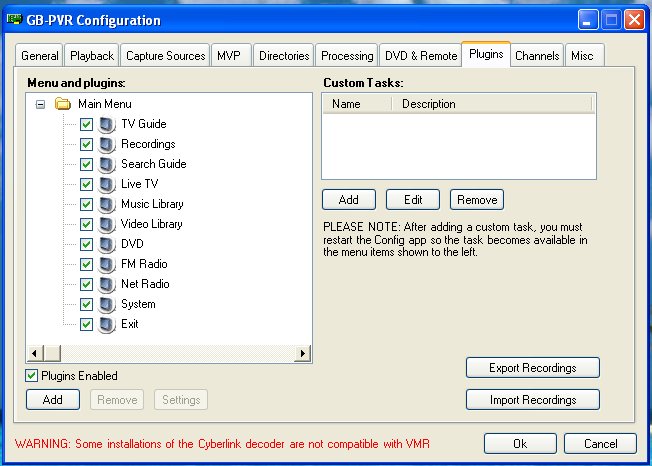
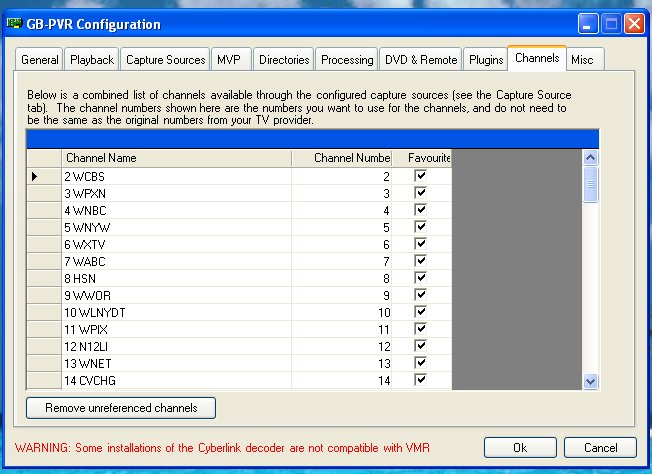
(see these screen shots for how I set the more important GBPVR Config & WinXP Display settings) - (optional)add optional software for increased functionality/protection
For example:- firewall (i.e. ZoneAlarm)
- anti-virus (i.e. Norton)
- anti-spyware (i.e. AdAware)
- GBPVR plugins (i.e. Weather Plugin, RSS Viewer, Commercial Removers, etc...)
- CD/DVD creation (i.e. Nero)
- MP3 ripper (i.e CDex)
- DVD ripper(* Important Note: The more software/plugins you add to you PVR, the more system resources you will use, the slower your PVR will run & the more strain you will put on your PVR - for best results only install those programs which you absolutely need.)
Minimum PVR Recommendations:
- ~1GHz CPU or better
- ~256 Megs RAM or better
- ~60 Gig hard drive or better
- Hauppauge PVR (or similar hardware encoding) TV tuner card
- CD/DVD Drive
Related Useful Site Links:
PVR Forums:
- Build Your Own PVR (www.byopvr.com)
- SHS (www.shspvr.com)
PVR Software:
- GBPVR (www.gbpvr.com)
- SageTV (www.sagetv.com)
- Beyond TV (www.snapstream.cm)
- Microsoft XP MCE [Media Center Edition] (www.microsoft.com)
Drivers:
- VIA Epia Drivers (www.via.com.tw)
- Hauppauge PVR Drivers (www.hauppauge.com & www.shspvr.com)
MPEG2 Decoders/Codecs:
- Free-Codecs (www.free-codecs.com)
- InterVideo (www.intervideo.com)
- Cyberlink (www.cyberlink.com)
- Nvidia (www.nvidia.com)
Frequently Asked Questions (Q & A):
Q: Can this play standard DVDs?
A: Yes, if you use a DVD drive, instead of a CD drive, you can play DVDs in GBPVR
Q: How much storage does a show take?
A: This will vary based on the length of the show being recorded and at what quality you are recording it at. However basic MPEG2 recording use:
- Low Quality = ~1 Gig Per Hour
- Medium Quality = ~2 Gigs Per Hour
- High Quality = ~4 Gigs Per Hour
Q: What issues have you had with building this PVR?
A: There were a number of issues I had, but solved though research, process of elimination & a little trial/error. They are as follows:
- Linux drivers/support for this motherboard is not quiet there yet. Especially when it comes to the on-board video card & hardware MPEG2 decoder. As such, I've abandoned trying to run MythTV on this box for a while.
- using the default v1.07 (official) BIOS, selecting Fail Safe settings in the BIOS caused the system to freak out upon reboot. To fix this, needed to reset to the default settings for the BIOS, which involves yanking the battery from the board & follow VIA's PDF on noted steps to reset the BIOS settings back their default settings.
- had an issues with random lockups, due to DMA bursting on the IDE channels. Needed to downgrade the BIOS from v1.07 (official) to v1.06 (BETA1). Once installed the BETA1 BIOS [for Linux users] from the VIA site, that resolved the random lockups.
- the PVR500 card would not fit into the PCI slot, because the lower 5.25" bay's frame was in the way. Needed to buy a special PVR riser card, which uses a ribbon cable - instead of a PC board so that I could mount the PVR500 card in the other slot, next to the motherboard.
- when trying to use 2 IDE drives, with both drives mounted in the offered 3.5" bays, and both connected to the same IDE cable, I found the standard flat IDE cables were a little too short. Resolved the issue by purchasing a longer round IDE cable. This also helped improve air flow in the case.
- the connectors at the end of the wires, which come with the Morex 668 case (for connecting the USB/Firewire ports & buttons/LEDs to the motherboard) all had individual connectors for each pin. As such, you needed to carefully figure out which wire went to each pin on my motherboard. Time consuming and careful attention to details within the VIA Epia SP PDFs resolved this part. It was more of a pain then anything else.
- had PVR500 recording issues with the official Hauppauge PVR500 drivers. Needed to use the ones from www.shspvr.com instead.
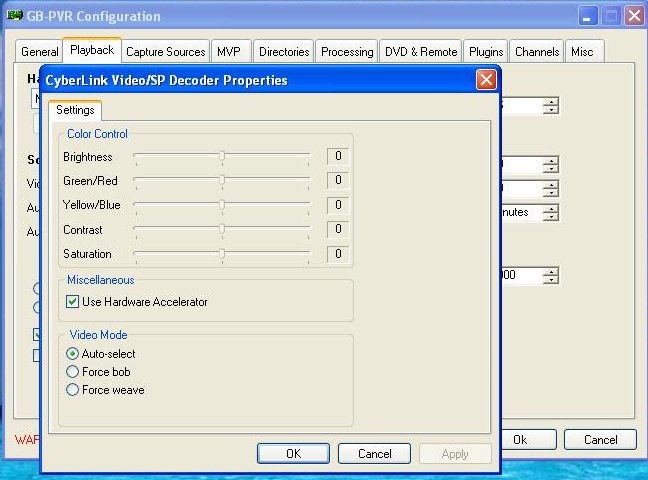
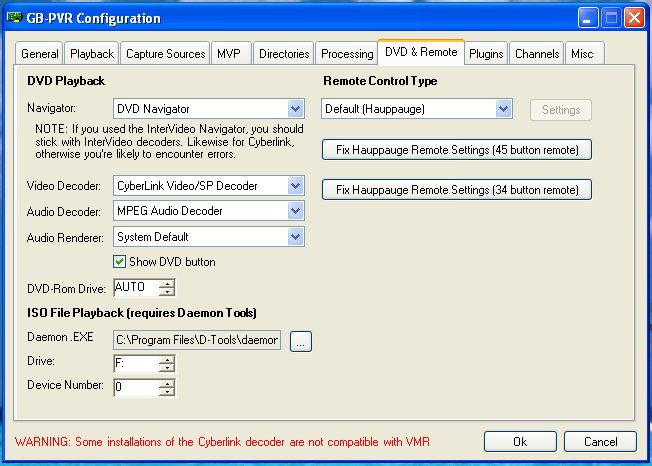
- had problems finding a MPEG2 decoder which would use the on-board MPEG2 decoder hardware on this motherboard. Found using the Cyberlink SP Video Decoder worked well, and included working hardware acceleration support. You can get it free from www.free-codec..com, if you download the ACE Mega CodecS Pack 6.03 - Professional Edition from the Codec Packs section of that site.
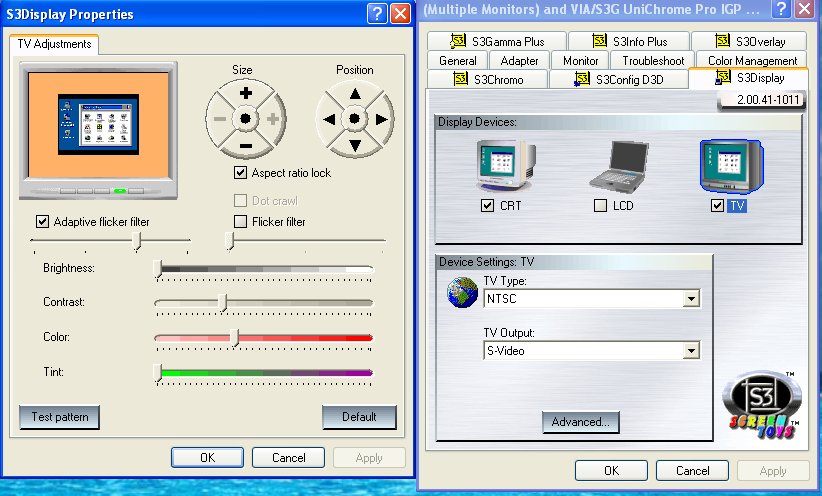
- depending upon your monitor &/or TV, you may want to tweak the brightness and color of each output device (meaning VGA & Svideo respectively) . This is a preference thing, as my monitor is over 7 years old and my LCD TV is pretty new. Each shows the brightness & color of the playback a little differently - so for me some tweaking was needed to the advanced video settings in Windows to correct this. I needed to add a little extra color to the Svideo & brightness to VGA to make them appear the same when put side-by-side.
- (to be completed) I want to continue to use the exposed 3.5" bay for one of my IDE drives, but I need a 3.5" exposed bay to install the iMon remote's IR receiver to. (I don't want to leave it sitting on top of my case exposed the way it is.) Anyway, I will need to cut/shorten the metal plate the IR receiver comes mounted on, in oder to make it fit between amount of space given in front of the IDE drive and the plastic faceplate of the Morex 668 case. Careful measurement already show it will fit there - so I don't need to have this connected externally to the case. Again, nothing hard to do here, just need to take the time to cut that metal plate to fit within the space provided.
These are the things I had issues with, but since I've already addressed them - it should make your build that much easier...
Q: Can you can record 2 shows at the same time?
A: Yes, this build is able to record 2 shows at once, even while watching another previously recoded show.
Q: I want to use different or more compact PC case, do you have any advice on this?
A: Yes. Should you go with a different mini-itx case, you may have some space issues to deal with when using the PVR500 card. You also may not need to order that special PCI riser. I only point this out, due to the problems I had with my build, why I selected that case in the first place & because I've read a decent number of posts online about the PVR500 not fitting many of the smaller, more compact mini-itx cases. With some of the more compact/low profile mini-itx cases, you may only be able to fit the low profile version of the PVR150 card &/or use USB based TV tuners.
A: Playback is jerky and CPU utilization is stuck on 100%. How do I try to fix this?
A: In my PVR, the CPU sits between 32% and about 54%, when using the Cyberlink SP decoder.
-
To lower the CPU usage:
- enable hardware acceleration in the Cyberlink SP decoder
- use the Overlay Management or VMR7 settings (VMR9 was not as smooth playing back & was more CPU demanding)
- in the GBPVR config, make sure you select the encoder pass-through option for the Live TV playback.
- make sure you are using the most current Via Epia SP13000 video card drivers (meaning the video card driver & 4-in-1 driver)
- reinstall DirectX9 after updating the video card drivers to ensure DirectX9 is correctly working.
- use only the shspvr.com drivers for your Hauppauge PVR500 card
- for live TV time shifting, I needed to extend the delay a little to give the hard drive a little extra time to catch up (especially when changing live TV channels)
Q: Did you install ALL of the drivers from the ACE package on free-codecs?
A: Yes, I current have all codecs installed from the ACE package (but not all that other apps/tools). However I needed to disable one codec group in the AVS dashboard, which does DirectX VOB & DirectX VOB streaming, because it caused an annoying error prompt each time I watched a recording show.
Q: Did you start by just installing the Cyberlink SP MPEG2 decoder?
A: Originally I installed just the Cyberlink SP codec and it worked correctly. You may want to limit it to that and then add other codecs as needed. Then I enabled hardware acceleration on it under the playback menu of the GBPVR config utility, after selecting Cyberlink SP. I also installed all the drivers in the codec pack. Make make sure you use all the newest VIA Epia SP drivers for best results as well.
Q: Did you install the Hauppauge base CD for the PVR500 and then update the drivers on shspvr.com?
A: I only used the drivers from shspvr.com site. I did not use the CD which came with the PVR500 card.
Q: Do you have any insight for me? There is no other software currently installed.
A: To prevent lockups, due to DMA issues, you will need to flash your BIOS.
You will need to flash it to the BETA1 BIOS (which is actually v1.06 with a small DMA fix)
You can download it from here
Q: When I installed the ACE codec pack with ONLY the Cyberlink SP codec, now CPU utilization sits between 25%-50% for live TV. Shouldn't it be lower?
No, however that that is good range for playback. I was surprised as well to on how much work the CPU needs to do. In the end, it appears VIA's marketing for the SP13000 provided end users the wrong idea on exactly how much work is offloaded to the on-board MPEG2 decoder. In reality, only about 10-12% of the MPEG2 decoding is offloaded to the on-board MPEG2 decoder, when using hardware acceleration with the Cyberlink SP decoder (verse using the same decoder software with the hardware acceleration option disabled).
You should find that recording with the PVR500 will only use about 3-5% of the CPU per tuner. As such, even when you are recoding 2 things at medium quality & playing a previously recorded show, you should still have CPU cycles to spare. However your hard drives will be pretty busy - with the hard drive light on about 2/3 of the time.
Q: I can no longer use VMR, I have to use Overlay Manager to get any kind of channel information.
A: Try reinstalling DirectX9 - this may fix your VMR issues.
-
Currently in my build:
- Overlay Manager works (OSD comes up ok)
- VMR7 playback fine (OSD used to work, but broke when I upgraded from GBPVR v0.96.08 to v0.96.12 -- haven't yet looked into the exact cause/fix to this.)
- VMR9 playback will be a little choppy, but will work. (never tested the OSD, since it puts too much load on the CPU)
At the given time, I use VMR7 for playback. I will work on getting the OSD to appear again once I get the chance to sit down & closely look into the issue. I have a feeling it may be a simple/stupid settings hidden way somewhere, but I won't know that until I look at this issue much more closely & do some research on it. From research thus far, it appears 2 settings must be made to the registry to activate this feature.
Q: Using overlay manager, every time i change channels or something it jerks a little bit.
A: I resolved this by extending the delay time for the Live TV time shifting in the GBPVR config. If memory servers me, this was set to a 1 second delay.
Q: Right now it seems like every time the hard drive reads it jerks, so i cant imagine it would work recording one show and watching another?
A: This is due to either the DMA issue with the BIOS &/or your IDE hard driver controller is set to PIO instead of DMA.
-
The way I fixed this was:
- flash the BIOS from v1.07 to the BETA1 version.
(*** WANRING: do not use the Fail Safe settings in any version of their BIOS – instead use the method noted in the Epia SP13000 online PDFs to reset the BIOS to their software default states. You have been warned...) - ensured that the Primary & Secondary IDE hard drive controller's hardware settings were set to use the fastest DMA setting offered. (aka - make sure you are not using the PIO mode)
Q: I haven't updated a BIOS in some time... how do you do it without a Floppy Drive? I don't know how to boot to a command prompt in order to flash it.
A: Well I've read that some have created bootable CDs with all the necessary files - however I found this to be too much work to create. When I flashed the BIOS on my Epia SP13000, I went with a more tried and true method. I used a USB based floppy drive and an old Win98SE PC to create my floppy & then used that to flash the BIOS on my PVR. I did however have a few problems along the way, and luckily for me, I didn't trash the Epia SP motherboard.
To turn my bad situation into something useful, I was able to use that experience to prepare an foolproof method to flash the BIOS without hitting any problems - should I need to do this again at some point.
-
Here is what I did. You may need to make adjustments as necessary:
- downloaded the BETA1 BIOS bin file and the Award Flash utility on the Win98SE PC
- connected the USB floppy drive to the Win98SE PC
- using Win98SE, I formatted the floppy (with the system files option selected)
- copied over the BETA1 BIOS bin file and the Award Flash utility to the floppy
- shut down the Win98SE PC & connected the USB floppy drive to my PVR
- followed the steps in the Epia SP PDF on how to clear the BIOS settings
(aka - follow the procedure which requires removal of the battery & switching a jumper on the Epia motherboard to clear the BIOS settings) - once the BIOS settings are cleared, I booted the PVR & went into the BIOS settings
- the only change made was to the boot order, which was set to boot from the USB floppy drive first
- saved the change & shut down the PVR
- then remove the BIOS write protect jumper from the motherboard
- then booted the PVR with the floppy I created
- using the Award Flash utility, flashed the BIOS from v1.07 to the BETA1 (v1.06) version.
(the old v1.07 BIOS was not backed up - since there was not enough room on the floppy) - then rebooted to see if things worked. In the POST screen, you should see the BIOS version should show "v1.06" , instead of "v1.07"
- since that work, I shut down the PVR & replaced the BIOS write protect jumper on the motherboard
- then followed the steps in the Epia SP PDF again, on how to clear the BIOS settings
(this was done just to ensure any BIOS settings are correct for that version of the BIOS) - once the BIOS settings are cleared, I booted the PVR & went into the BIOS settings
- set the BIOS settings normally
- saved the change & rebooted the PVR
- all done.. :-)
Q: When i try to reinstall directx9 it seems to detect that I already have it, and does nothing. Is there a way to uninstall it first?
A: Try to download the most current version of DirectX9 from Microsoft's web site (www.microsoft.com/directx). The one I downloaded was the full version of DirectX9 (which does not need to download anything when run, so you can install it on PC which are not Internet ready/connected). The download was about 50 megs, before I unzipped it. Anyway, whenever I used it, it overwrote the existing DirectX9 files on my PVR - and as such I did not receive that DirectX prompt you noted about.
Q: How can I flash the BIOS without a floppy drive, and using NTFS?
A: This is how others did it.
- Go to a computer with a floppy disk drive.
- Insert floppy.
- from windows -> my computer -> floppy drive -> format.
- check "create MS-DOS boot disk"
- Format the disk.
- Copy over the flash utility and BIOS file.
- I used NERO burning ROM to create a bootable CD.
- Open NERO and go to "CD Boot"
- specify the floppy drive as the bootable drive
- Burn the CD.
- Boot off the CD and it should drop you to a simulated floppy drive command prompt where you can flash your BIOS.
* WARNING: I accept no responsibility for any damage caused to your computer by following this procedure. This worked for others, but your mileage may vary!
Q: Can you give me a fast rundown on how you did your software/os installation:
A: here is what to do (I'm doing this from memory, so you may need to tweak as necessary):
- when using the [BETA1] BIOS, use the Optimum Settings feature & then tweak as necessary for even better performance
- do clean install of WinXP
- apply all current Via Epia SP drivers that is needs. (this should be Audio, Video, 4-in-1, LAN & maybe a few others.)
- install the PVR500 drivers from shspvr.com
- update WinXP via Live Update, until you cannot patch it any more (include hardware driver updates)
- install ACE codec package (for a minimal setup use the Just Playback pre-defined group)
- reinstall DirectX9, if necessary
- install GBPVR v0.96.12
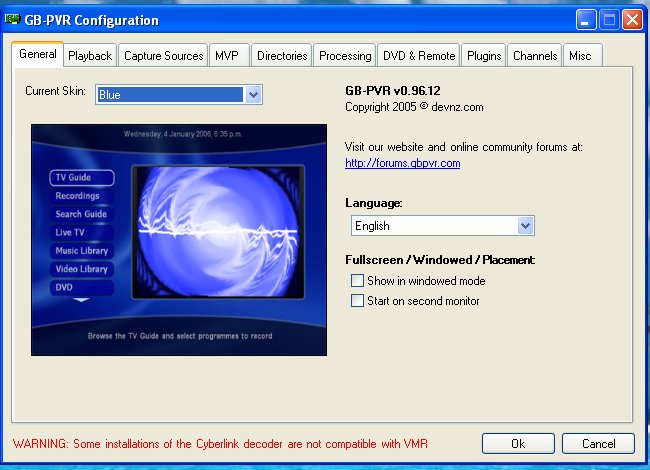
- in GBPVR Config
- do the normal stuff to setup the TV Tuners and EPG stuff
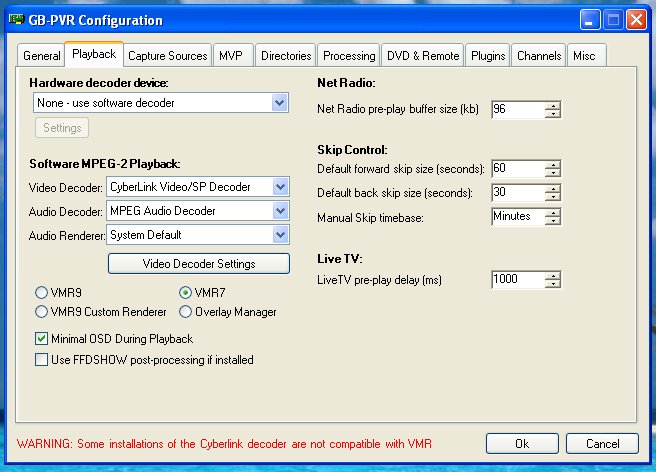
- select the VMR7 setting (under Playback tab)
(I also turned off FFDSHOW & use the Minimal OSD option) - select the Cyberlink SP decoder (under Playback tab)
- in the Cyberink decoder settings, enable Hardware Acceleration (accessed under the Playback tab)
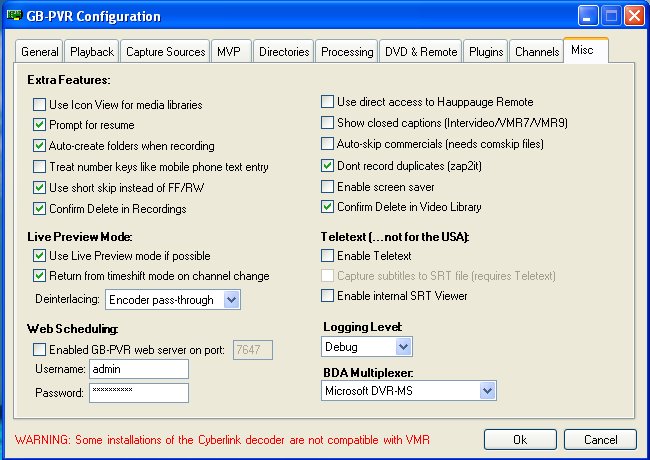
- select the Encoder Pass-Through option (think it's under the Misc tab)
- added a little extra time to the delay setting for time shifting when changing channels
- lastly I have GBPVR set to leave time shifting off when normally watching live TV
[I only activate it when I want to actually want to use it, like when the dog just has to go out for a walk... ;-) ]
- once you save the change to GBPVR, everything should work pretty smoothly. If not, you should see above for how to address the hard drive & CPU load issues.
Q: With this motherboard, shouldn't there be some sort of support for this MPEG decoder if they did go through the trouble of adding it to the board?
A: Well kind of.. From what I got from the VIA & EPIA specific forums, it appears VIA only added the hardware to the board. It still requires each software company to actually write codecs/software to make use of it. For example, Nero 6 has hardware acceleration features for MPEG2 playback, but appears to never have added support for the Epia on-board MPEG2 decoders - as such the hardware acceleration option does nothing on this board. However it appears that Cyberlink 5 has added support for this board. I've also read (but never tried/verified it) that certain versions of Intervideo support this board as well.
Q: Why are we working around this with the Cyberlink software decoder?
A: As noted above, the on-board MPEG2 decoder still requires software to make it work. Unfortunately it is not like the Hauppauge PVR350 cards, where Hauppauge actually created all the drivers & support to use that card's on-board MPEG2 decoder. So as you can see, it will still require a MPEG2 codec which can access/use the on-board decoder.
Q: Is Via just taking advantage of users which purchase this motherboard for the on-board MPEG2 decoder ability?
A: Well kind of.... The VIA CN400 chipset/solution is more of a marketing ploy then anything else. However I am happy with the results of my PVR build and with the work arounds noted, you should have a nice stable PVR. It think it's only a matter of time before better Windows & more Linux ready solutions become available which fully support this chipset. From what I've read, great strides are being made on the EpiOS and other Linux specific distros for support this CN400 chipset and it's on-board hardware. Since this chipset is still fairly new, it will be a while before more user friendly solutions become available. For now its simply a wait an see game....
Q: What is the CPU usage with different MPEG2 decoders with/without Hardware Acceleration?
A: As to the CPU load during playback with hardware acceleration, it was about 10+% lower then the specs I posted when I had Win2k installed on my PVR. You can read more about this within the GBPVR Forum. This has also been summerized below to save time.
At the time, I was running the following hardware:
Via Epia SP13000
1 Gig DDR400 RAM
100 Gig Maxor IDE Hard Drive (for OS)
500 Gig Hitachi IDE Hard Drive (for PVR data)
Hauppauge PVR500
Samsung 16X DVD +/- RW IDE Drive
And software/drivers:
Via Epia Bios v1.07
Windows 2000 w/SP4 (fully patched)
GBPVR v0.95.16
Hauppauge PVR500 drivers v2.0.24.23025 (from shspvr.com site)
Nero Video Decoder (from Nero 6 Ultra Edition - with the v6.6 upgrade)
Via Epia Video Driver v16.14.10.188 (from via.com.tw site)
In effort to enable the CN400 onboard hardware MPEG2 decoder (found on this Epia motherboards), while outputting the picture to Svideo,
I used the hardware & drivers noted above, in addition to the settings/codecs below, to get the following results:
Nero Video Decoder (from Nero 6 - see previous post):
-- will not use hardware MPEG2 acceleration, even though the option is enabled.
-- hardware acceleration option set via Nero Showtime.
-- Overlay Manager option (CPU usage 62 to 74%) - playback ok, but choppy at times
-- VMR7 option (CPU usage 100%) - renders very slowly, not acceptable for playback
-- VMR9 option (CPU usage 100%) - renders very slowly, not acceptable for playback
Elecard MPEG2 Video Decoder (from the ACE Mega CodecS Pack 6.03 - Professional Edition):
-- could not figure how to enable hardware MPEG2 acceleration
-- Overlay Manager option (CPU usage 85 to 100%) - playback choppy, not acceptable for playback
-- VMR7 option (CPU usage 100%) - renders very slowly, not acceptable for playback
-- VMR9 option (CPU usage 100%) - renders very slowly, not acceptable for playback
CyberLink Video/SP Decoder (from the ACE Mega CodecS Pack 6.03 - Professional Edition) [aka - Cyberlink 5]:
-- will use the hardware MPEG2 acceleration, which appears to reduce the CPU usage by about 10 to 12%.
-- hardware acceleration option set via Playback tab of GBPVR's config program
-- will allow usage of VMR9, VMR7 & Overlay Manager
-- Overlay Manager option (CPU usage w/acceleration 42 to 65%) - playback good, but a little grainy (could just be my PC)
-- VMR7 option (CPU usage w/acceleration 50 to 72%) - playback very well, very little shuttering (if any)
-- VMR9 option (CPU usage w/acceleration 65 to 83%) - playback well, some shuttering
Cyberlink MPEG2 decoder (from PowerDVD6 Trial) [aka - Cyberlink 6]:
-- hardware acceleration option can be set via Playback tab of GBPVR's config program
-- did not render with VMR9, VMR7 or Overlay Manager (blank or scrambled screens - could just be my PC)
The CPU usages are approximate, and may be slightly different on your box. These were typed from memory, so expect them to be a few % points off (+ or -), but should be pretty close to what got when I ram my tests.
Overall, using Cyberlink's video decoder (from the ACE Mega CodecS Pack 6.03 - Professional Edition), with the VMR7 option selected & with the hardware acceleration feature enabled, seams to provide the best balance of CPU usage & picture quality. With these noted settings & drivers, the picture quality is very clear, with little to no shuttering during playback, even while recording 2 shows in the background at the same time.
Update 04/11/06:
-- tested Cyberlink 5 with WinXP => VMR9, VMR7 & Overlay Manager all worked (VMR7 gave me the best results)
-- tested Cyberlink 6 with WinXP => VMR9 & VMR7 could not display video (but OSD worked). Overlay Manager was acceptaible, but not perfect.
Q: How do i boost the brightness when using the SP decoder? The sliders are grayed out.
A: I only used the properties of the Cyberlink codec to enable the Hardware Acceleration. All the color balance and brightness adjustments were done via the advanced properties of the Windows display settings. With that, you can separately adjust the color balance and brightness for each video port (aka - VGA, SVIDEO, etc..). Under the Svideo settings, I was also able to adjust other things like the Svideo screen size/position, the adaptive filter settings and other such things.
Q: Knowing what you know now & if given the option to do this again, what you would change in your design?
A: I'm very happy with this setup & the hardware selected. However given the chance to change things, I would replace the 500 Gig IDE hard drive with 2 - 500 Gig SATA drives (setup in RAID 0). This would have multiple benifits. First this would double the storage capacity of this PVR. Secondly, using 2 drives would reduce the load placed on any specific hard drive during reading and writing. Lastly, with each recorded show spanning across 2 drives, the PVR should be able to support more concurrent connections to the PVR data from other devices on my network (such as from my desktop PC & my laptop), without introducing lag or load issues when PVR is doing it's normal thing (recording 2 new shows, while playing back a previously recorded show).
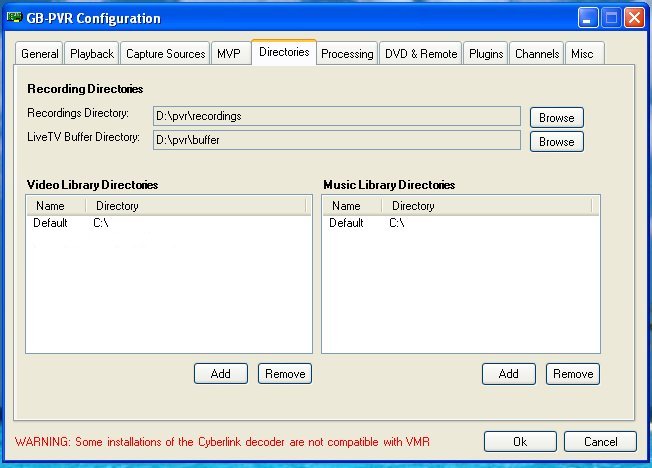
Q: Can I access my PVR's recordings from another PC/device on my network?
A: Yes, I have done this via my wired and wireless networks.
Q: What speed does my wireless LAN need to support to stream my vidoes correctly to my wireless device?
A: Through trial and error, I have found that a "B" wireless router was not fast enough. It used 100% of the bandwidth to stream a medium quality video to my laptop. After about 5 minutes the video got very choppy, but the audio was ok. When I graded my wireless LAN with an "G" wireless router, playback is perfect, with bandwidth left over.
Q: What speed does my wired LAN need to be to stream my videos correctly to my wired device?
A: I have only tested this with a 100 Megabit connection, which streams perfectly. With the results I had with my 11 Megabit wireless LAN tests, I would supect a 10 Megabit wired connection may not be fast enought.
Q: How did you test your wireless connection to the PVR data & what was the results?
A: Here is what I did thus far: When testing streaming ability from my PVR to Acer 3002LCi laptop with my new Linksys wireless “Gâ€Â router, I was very happy with the results. My laptop runs Fedora Core 5 and uses the Xine player. All I needed to do was mount the 'recordings' folder that I share on my PVR to an empty folder on my laptop (aka - a SMB mount point). Then from within Xine, simply open any MPEG2 file I wanted to watch within the mount point's folder on my laptop's hard drive. Playback was flawless. Pausing, Stopping/Resuming, Fast Forwarding and Rewinding also was perfect. There appeared to be no load on the PVR, except for the hard drive I/O, which appeared to be the same load seen while recording a single show normally. I was able to easily watch several previously recorded shows/movies without an issue, even while the PVR recorded 2 other shows. There were no lockups & no errors appeared within the shows that I recorded at that time. CPU usage on my on laptop sat at 12%, wireless bandwidth usage sat between 75% & 80% during playback. I'll need to see how much CPU load was actually placed on the PVR when this was happening, however it would appear to be nominal, since the GBPVR menus and navigation was very responsive. I'll also need to see what happens when recording 2 shows, watching one via my laptop and one via the PVR. If what I've seen thus far is any indication, it should work well.
Q: How can I connect a TV in another room to my PVR to watch the recorded shows.
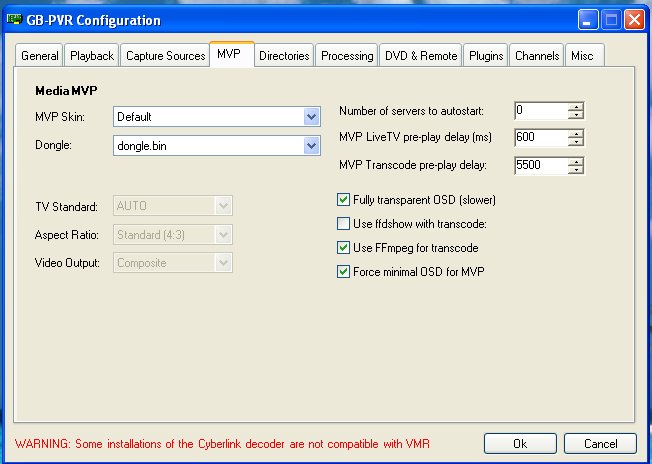
A: There are several ways this can be done. GBPVR supports the Hauppauge MediaMVP natively. This is most likely your easiest & best solition. However I have read in several PVR forums that Dlink and other companies have products which are simular to the MediaMVP, which work as well. Of course these products are not integrated directly into the GBPVR application like the MediaMVP is. And of course, you can always share the recordings folder on your PVR & use another PC or laptop to access that data across your network (just like I do with my laptop and desktop PCs). Other solutions would also exist, but you would need to do the research for those solutions...
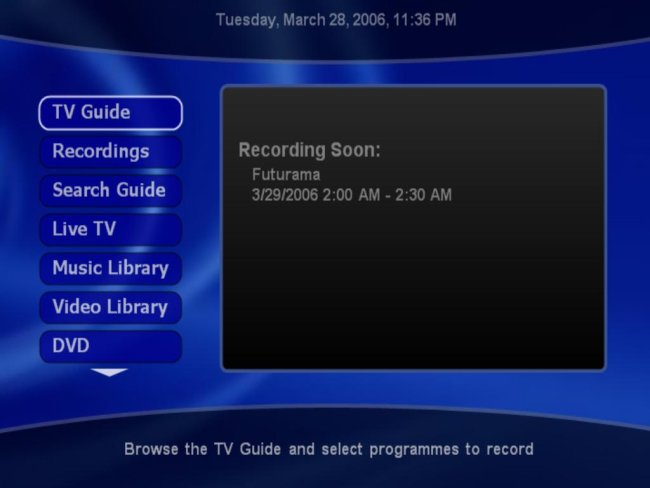
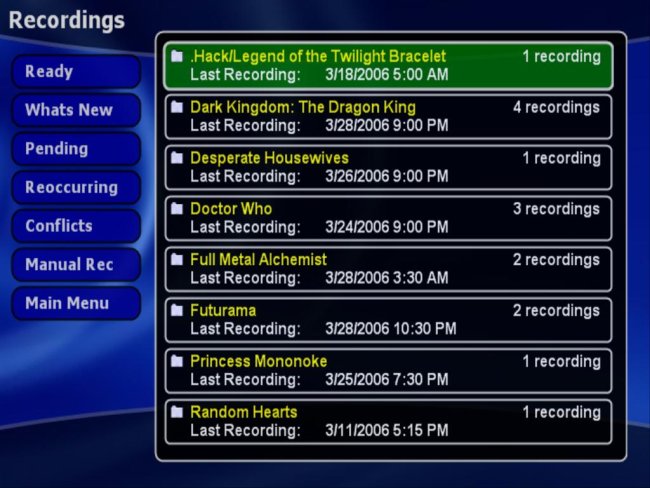
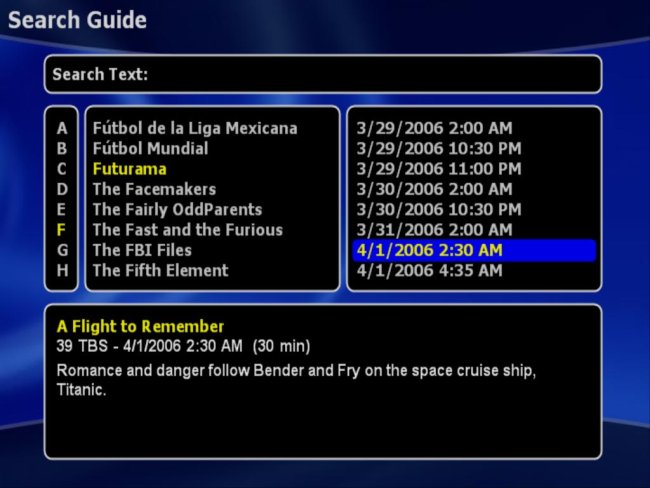
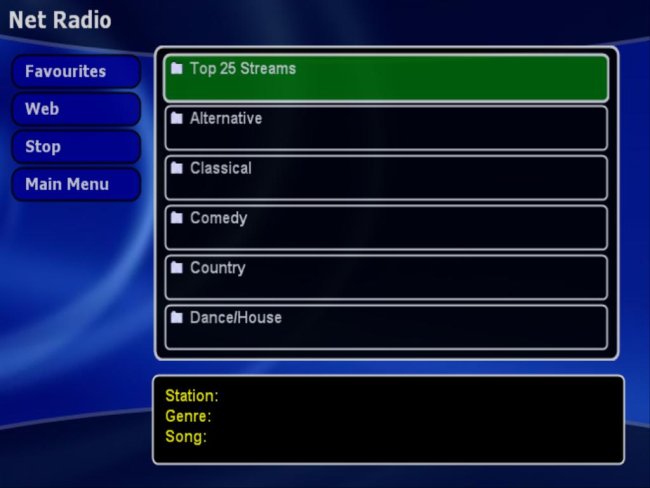
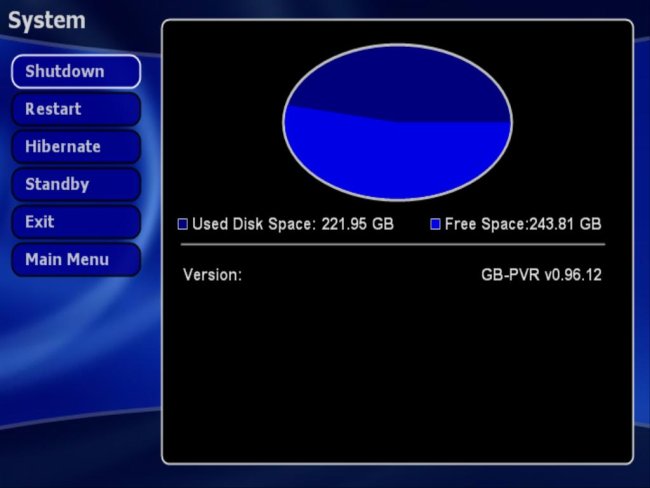
Screenshots: GBPVR Application
Screenshots: GBPVR Config Settings:
Screenshots: Windows XP Display Properties: